Table of Contents
In this guide, we will describe some of the possible causes that can create a temporary file in Windows XP, and then show you some ways to fix this problem.
Updated
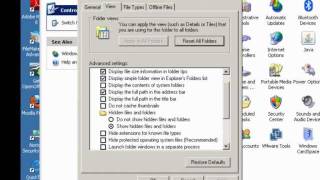
The temporary file contains all temporary file folders for Windows XP technologies. From the Tools menu, select Folder Options. Now you can open the folder options window. Click Show Deviation. Under Hidden files and folders, select the Show hidden files and folders check box.
Temporary files are exactly what they probably look like: files that your main operating system only needs for a short period of use, but now usually take up disk space. Most temporary files are stored in a so-called Windows temporary file, the location of which differs from computer to computer and even from user to user.
Time clips are used by our computers to increase speed and functionality. When we use any Solitaire program to program a database, our computers do hundreds or thousands of tasks for you, behind the scenes … creating, modifying and sometimes deleting files.
Leaving recordings are called temporary songs. Temporary files- it’s just; temporary, but superfluous. Thousands of them can accumulate over time and take up valuable storage space, but they can also slow down your computer.
Since 98, Windows Microsoft has provided us with a great little tool called Disk Cleanup. Disk Cleanup can remove temporary files from the Internet, Windows temporary files, and most importantly, in an easy-to-use application. Disk Cleanup can be found:
Updated
Are you tired of your computer running slow? Annoyed by frustrating error messages? ASR Pro is the solution for you! Our recommended tool will quickly diagnose and repair Windows issues while dramatically increasing system performance. So don't wait any longer, download ASR Pro today!

1. Click Start
some. Click Programs (All Programs)
numerous. Click “Accessories”
4. Click System Tools
5. Click Clean Disk
.
You can also access Disk Cleanup by RIGHT-clicking the hard drive icon in My Computer or Windows Explorer, and then clicking Properties.
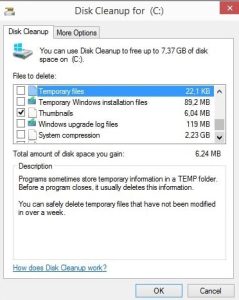
Check all the boxes above the items you want to remove from the system (all of them are optional). Then click OK and each of these files will be deleted.
This tool does a pretty good job and actually works on Windows, but it leaves behind some extraAdditional temporary files that need to be deleted every 4-6 weeks.
To keep the temporary Internet from spiraling out of control, read our advice on limiting disk space for these files here.
Two-thirds of our favorite wedding tools remove almost all temporary files:
Both are free and work great. However, if you are a complete master and don’t mind getting your poker hands a little dirty, here are the steps to teach you how to completely clean up your approach without additional tools.
How can delete temp files in Windows XP?
Close all open applications.Open “My Computer”.Right-click the system drive and select Properties if necessary.On the General tab, click Disk Cleanup.Scroll down the Files to Delete list and select Temporary Files.
DISCLAIMER – These details require special attention to detail. Don’t try these advanced steps if you’re not happy with it.
Can I delete Windows system temp files?
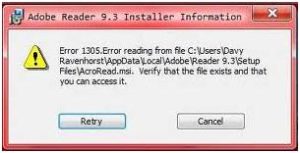
In general, I would say that everything in the Temp folder is safe. Sometimes you may get the message “Unable to delete because an instruction is being used”, but your needs may simply ignore these files. For security reasons, you should disable the Temp directory immediately after restarting the corresponding computer.
To find and delete temporary files that Windows cannot retrieve with Disk Cleanup, follow these steps:
Is it OK to delete temp files?
It is completely safe to delete temporary files from your computer. The work is usually done automatically on your computer, but this is not means you cannot do it manually.
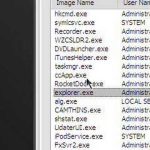
1. Double-click “Computer” on the desktop, or click it on the “Start” menu.
2. Double-click the “C” drive (your hard drive)
3. Click Tools -> Folder Options – All in the
menu 4. Go to a specific view tab
5. And click on the circlewith the name “Show files”
6. Click “OK”
7. Double click “Documents and Settings”
8. Double-click the computer designated by your user (in some cases it can be the owner or registered user)
9. Double-click the Local Settings folder type.
10. Usually double-click the Temp folder.
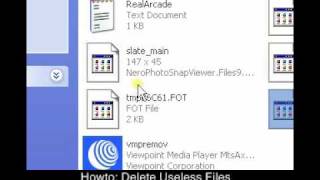
11. Click “Change” -> “Select All” in the menu
twelve month period. Press the Delete key on your keyboard
15. Click “Yes”
14. Make sure you click the Back button on the toolbar.
15. Double-click the temporary Internet files folder.
06. Click Edit -> Select All in Menu Types
17. Click “Delete”
on this keyboard. 18. Click “Yes”
15. Close the window and empty the trash.
If you do not want to follow these instructions, please contact an IT professional who can help you.

We know. Windows XP, like Windows 7, may be outdated, but most people still rank first and second among the most popular versions of Microsoft Windows. The reason they continue to outperform their chosen versions is mainly because they are easier to manage and use, just like the users. There are some problems, however, as it saves a lot of hard drive space by using temporary files that you don’t need. Check out these great helpful tips on how to delete files in Windows XP or Windows 7 on.
Many people do not know and do not know how much space they are losing on resource-intensive disks of their computer due to temporary files stored only in Windows. Many are surprised to findThey realize that almost half the size of their hard drive is simply wasted on temporary files that take up holes. But what are temporary files really? Temporary files are used by our computers, as well as laptops, to keep things running faster and launch devices behind the scenes. Every time you use a Windows program, hundreds or thousands of tasks are executed in the scenes that Windows runs. From design and modification to accidentally deleting these processes, running processes help Windows run much faster and smoother. However, when you close a particular program, a large number of files and files of technical personnel are left behind. After several seasons of the year, these files accumulate, and over the course of a year, they can clog up gigabytes of hard disk space in these places. Oddly enough, the same files created for Windows are faster and may run slower due to lack of space.
Where are temp files located in Windows XP?
The Temp folder contains all temporary files and folders for all Windows XP systems. From the Tools menu, select Folder Options. Under Hidden files and folders, select the Show hidden files and folders check box and select all files and folders your family can see in the Temp folder by pressing Ctrl + A.
Windows comes with a very useful application for users called Disk Cleanup. This tool can help you remove various temporary files.files such as: Windows temporary files. Temporary Internet files, not to mention others. To use this tool easily:
- Click Start.
- Click All Click Programs.
- about accessories
- Click System Tools.
- Select Disk Cleanup.
Or, you can right-click any of the hard drives in the computer window (if users have more than one) and select Properties. (See Appearance below)
Whatever you choose, the next step will open this window –
Make sure you check the box (highlight) or the box below (as we did with the RED ARROWS) –
You will receive a warning asking if you really want to take these steps.

** PLEASE NOTE that selecting old compressed text field files will probably take a long time. So be patient. Since these files have been accumulating for so long, it will also take a few minutes. However, it’s usually worth it because it doesn’t require a lot of storage space. East
There is also an excellent CCleaner program thatWe highly recommend it. With this great hardware, you can clean up even more meaningless and unnecessary files that are left on your current PC or computer. It’s important to note that CCleaner is free and comes with several other tools, such as a registry remover and even a startup cleaner.
Do you like home? Then check out our tips for saving phone space
Although the tough efforts increase from time to time, cleaning up files is very necessary, not only in terms of disk space, but unfortunately also in terms of the speed and performance of your computer.
How can delete temp files in Windows XP?
Close all Windows applications.Open “My Computer”.Right click on the system drive and select Properties.On the General tab, click Disk Cleanup.Scroll down the Files to Delete list and select Temporary Files.
Is it OK to delete temp files?
It is completely safe to delete temporary file types from your computer. The work has usually always been done by your computer automatically, this does not mean that you cannot complete the task manually.
Can I delete Windows system temp files?
In general, you can safely delete Everything is in the Temp folder. Sometimes you may get the message “Unable to delete because the file is already in use”, but you can simply ignore these personal files. For security reasons, delete the temp list immediately after restarting p. AGAINST..
How do I clean out temp folder in Windows XP?
To quickly find and clear the main Temp folder, follow these steps: Close and restart Windows XP directly. Enter% Temp% in the Open text box and click OK. Windows Explorer immediately launches the Temp folder. Since you just restarted the engine, in addition to the folders you find there, you can safely delete all files.
Is it safe to remove files from temp folder?
The TEMP folder, as the name suggests, is actually used to store temporary files and directories created by Windows services as well as many third party programs. Since the files and folders stored in the temporary file are temporary, they can be easily stolen.