Table of Contents
Updated
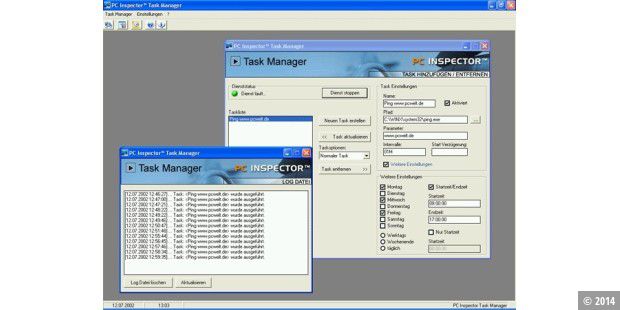
If you see an error in the PC Inspector Task Manager guide on your computer, check out these troubleshooting ideas.
Updated
Are you tired of your computer running slow? Annoyed by frustrating error messages? ASR Pro is the solution for you! Our recommended tool will quickly diagnose and repair Windows issues while dramatically increasing system performance. So don't wait any longer, download ASR Pro today!

Mannequins always present complex concepts and make them easy to understand. Mannequins help all people to be more informed and more confident in applying their knowledge. Will you pass this tough test, will you qualify for a big promotion or even master this engraving technique; People who rely on models know they can be relied on when they acquire the skills and information they need to succeed.
PC Inspector File Recovery is a data recovery tool that recovers extracted data and thus recovers it by accident. Data recovery is needed almost everywhere nowadays. Buying data recovery tools like PC Inspector File Recovery is a good idea. This and other similar programs allow users to easily recover files in their original language. If you are prone to data loss, this article will not only show you how to use PC Inspector File Recovery to recover data lost in the past, but will also provide you with much more efficient performance An active alternative.
- Part 1: Best PC Inspector File Recovery Software for Windows and Mac
- Part 2: How does Inspector PC file recovery software work?
Special Part: Best PC Inspector File Recovery With Alternative Software For Windows And Mac
Step 1. Download Recoverit
Download and install Recoverit yourself. Launch the program and select “Recover Lost Files” in the main window. You should see the following window.
Step 2. Generally, scan the drive.
Select the disk containing the resources you want to recover, then click Start to begin the simulation process.
Step 3. Start recovering your lost file.
When the scanning process is complete, the entire contents of the selected disk will be displayed. You can preview the recording data and then select the files that you usually want to recover. Click “Recover” to save the files to a different geographic location. It is recommended to select a new drive, literally External storage is highly recommended.
Part 2: How To Get Back The PC Inspector Files We Have?
As mentioned earlier, PC Inspector File Recovery is a very specialized and efficient data recovery software. To reveal its strengths and weaknesses, let’s take a closer look at how this software can be used to recover lost data from almost all of your devices.
Step 1. Purchase PC Inspector File Recovery and install the following. It is important that you install most of the program to a hard drive different from the one to which you plan to restore files. This will reduce overwriting or corruption of deleted or compromised files.
Step 2. Launch Inspector on the PC and we should see several options. These options are divided into 3 categories: Recover Deleted Files, Find Lost Data, and Show Lost Disk. Select Scan for Lost Data when you have lost data due to one quick format, system, or crash. Find a lost disk when for some reason the entire disk is unavailable, possibly due to a broken partition. Click the icon to select the second of all categories that you want to select.
Step 3. In this tutorial, my husband and I use Recover Deleted Files to recover deleted files from SD card. After you have selected a product, the program will scan all disks that you see connected to your PC and show you a list of available people (from which you can recover music). To get started, select the appropriate drive from the index.

Step 4. You can see if you have selected the correct money simply by clicking on the “Preview” button. This will show you all content related to the root directory of the drive. Thus, you have to make sure it contains the directories you want. However, you cannot view the contents of the folder.
After making sure you have selected the correct file, click the green checkmark and the program will search for the files you deleted. This process can take from several minutes to several minutes, depending on the size of the disk.
Step 5. On the left, you will see a set of folders. Since we want to return the photos, we have chosen the DCIM directory. Since the files have not been overwritten, they are displayed with their full names from the original file and a green mark indicating that companies can be restored. If the files were properly informed or the disk was highly fragmented, red and yellow icons would appear in the file names, indicating that the business cannot be recovered.
Select the files that you probably want to recover, right-click and select “Save As …”. A new window will open in which you can select the destination directory for the recovered files. Click the green checkmark to restore files.
The healing process can take several minutes, because by then you should have saved all of the person’s recovered files in the selected file. While PC Inspector can be effective, there are some drawbacks to this recovery program. Some of these include:
• You are using the installer on a different drive toprevent overwriting of deleted data. This makes the program itself an imminent threat to your data.
• As shown in the manual above, this program is not easy to use. Easy not to sculpt if you’ve never used them all.

PC Inspector File Recovery may be a good program, but there is a software recovery tool that promises even better performance and quality while making the capture process as easy as possible. This is Recoverit for Windows (or Recoverit for Mac).
- It offers four different recovery options depending on the type of data and the circumstances that lead to data loss from your computer.
- The program will scan the device and show this preview of the files that need to be restored. It can be used to recover various types of data, including photos, documents, as well as emails.
- It has a powerful, simple and user-friendly interface.
- Scanning is fast and clear. You can alsothose to pause the scanning methods at any time to really see the files you want to work with during the scan.
Pc Inspector Task Manager Anleitung
Gestionnaire De Tâches D’inspecteur De PC Anleitung
PC Inspector Task Manager Anleitung
Pc Inspector Task Manager Anleitung
Диспетчер задач Pc Inspector Anleitung
Pc Inspector Taakbeheer Anleitung
Administrador De Tareas De Pc Inspector Anleitung
PC Inspector 작업 관리자 Anleitung
PC Inspector Task Manager Anleitung