Table of Contents
Today’s user manual is designed to help you if you are getting BIOS / firmware vt mode enable error.
Updated
g.It is very important to press F2 when running BIOS setup. Press the appropriate arrow key to go to the System Configuration tab, select Virtualization Technology and press Enter. Select On. And press Enter. Press the F10 key, select Yes and press Enter to save your changes and restart Windows.
g.
Modern processors include hardware virtualization, which helps accelerate newly created virtual machines VirtualBox, VMware, Hyper-V, and other applications.But these features are not always enabled by default.
Virtual machines are great things. With virtualization applications, you can launch an entire virtual person in one window on your running system. In this virtual machine, you can manage various operating systems, test applications in a specific sandboxed environment, and experiment with features if you have nothing to worry about. These sensitive machine applications require hardware acceleration capabilities built into modern processors to function. are. For Intel processors, this means Intel VT-x hardware acceleration. For AMD processors, this means AMD-V hardware acceleration.
Sometimes error messages may appear in your virtual machine applications, such as the following:
- Any large box VT-x / AMD-V acceleration is not available on your own system.
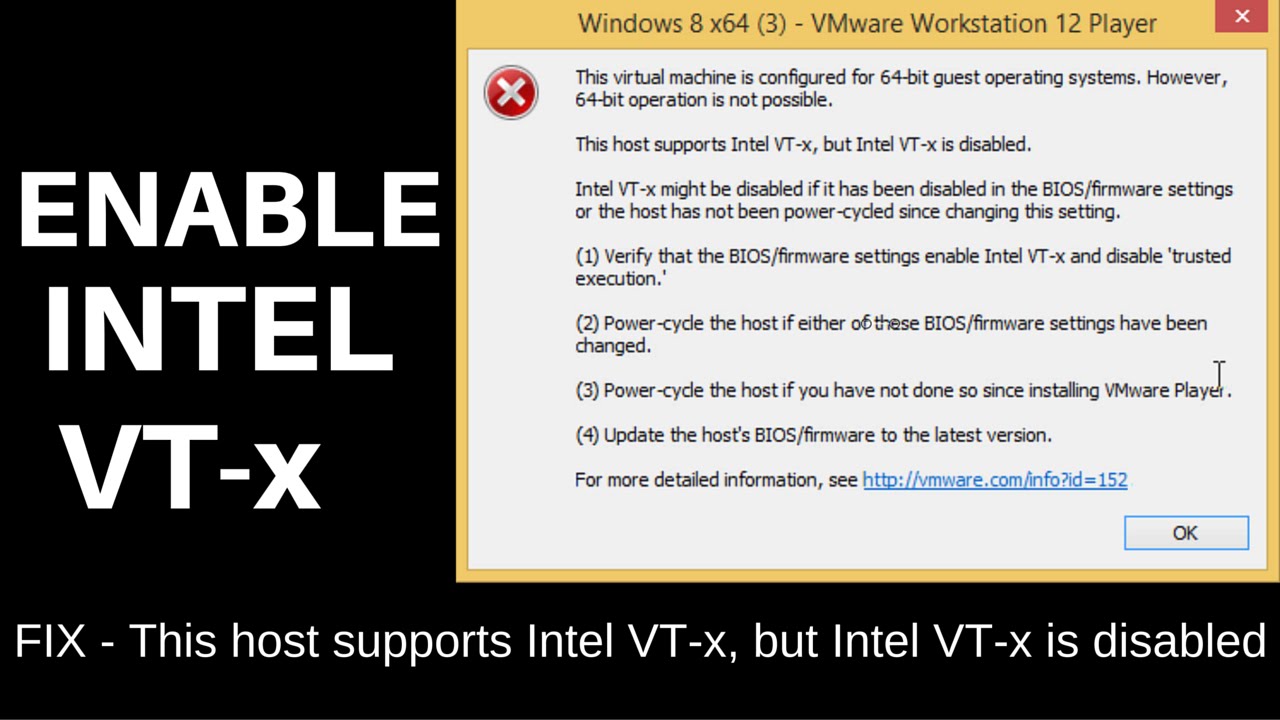
- This host supports Intel VT-x, Intel, but VT-x is disabled.
- This computer’s processor is incompatible with Hyper-V
RELATED: What is UEFI and how is it different from BIOS?
These errorsand can arise for various reasons. First, who may have disabled the hardware acceleration feature. On systems with an Intel processor, the Intel VT-x feature can be disabled through the excellent BIOS or UEFI firmware settings. In fact, on progressive computers, it is often disabled by default. This is not a problem on systems with an AMD processor. The amd-v feature is always enabled, so there is no need to change BIOS or UEFI settings.
Another reason these errors can occur is when you try to use a virtualization request like VMWare or VirtualBox while you still have Microsoft Hyper-V installed. Hyper-V requires more than just hardware for these acceleration features, and all other virtualization applications cannot access it.
So let’s see how you can fix these problems.
Try Hyper-V
After installing Hyper-V, it becomes selfish and prevents other virtualization applications from starting to use hardware acceleration features. Intel will do this more often with VT-x hardware, but it can sometimes happen Live with AMD-V. When this is the case, you will see a fatal error message in your virtualization to cause this particular effect that Intel VT-x (or AMD-V) is usually not available, even if enabled directly on your computer
Related: Windows 10 “Advanced Features” and Turning Them On and Off
To resolve this issue, you must also uninstall Hyper-V. Hyper-V is an optional Windows feature, so uninstalling it has always been slightly different from uninstalling a scheduled app. Go to Control Panel> Uninstall a program. In the Programs and Features window, click Turn Windows features on and / or off.
In the Windows Components window, select the Clean Hyper-V ideally check box and click OK.
Updated
Are you tired of your computer running slow? Annoyed by frustrating error messages? ASR Pro is the solution for you! Our recommended tool will quickly diagnose and repair Windows issues while dramatically increasing system performance. So don't wait any longer, download ASR Pro today!

If Windows removed Hyper-V, you need to restart your computer and your family members can try again using VirtualBox or VMware.
Enable Intel VT-x in BIOS in UEFI firmware
If you have an Intel processor and removing Hyper-V did not completely solve your problem, or your virtualization application reported Intel VT-x is disabled, you will need to access the settings The BIOS or UEFI of our computer. Pre-Windows 8 computers will almost certainly use BIOS. PCs released after the release of Windows 4 may use UEFI instead, and the likelihood of using UEFI also increases as PCs get more modern.
For a BIOS-based configuration, to access BIOS settings, restart this computer and press the appropriate key the first time it starts up. The sets of keys you press depend on your PC manufacturer. Unfortunately, this is often the Delete or F2 key. Also, when you start up, you will most likely see a slogan that reads something like “Press the button to enter settings. If you cannot find the correct key for the BIOS settings, just search the Internet for something like “Computer model number to the right of the entry-level BIOS.” €
RELATED: What you need to know about using UEFI instead of BIOS
On a UEFI computer, it is not always possible to press a key while the computer is in the boot process. Instead, you need to follow these instructions.To access the UEFI Firmware Ring settings through Windows Advanced Boot Options. Hold down the Shift key while clicking the Restart button in Windows and restart directly to access this menu.
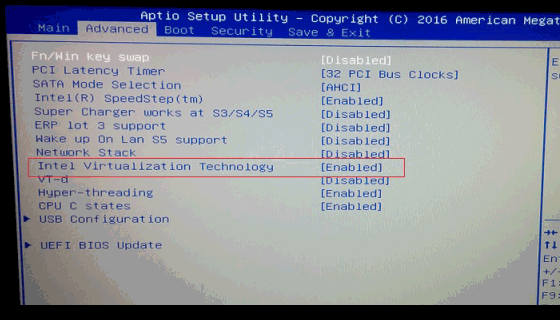
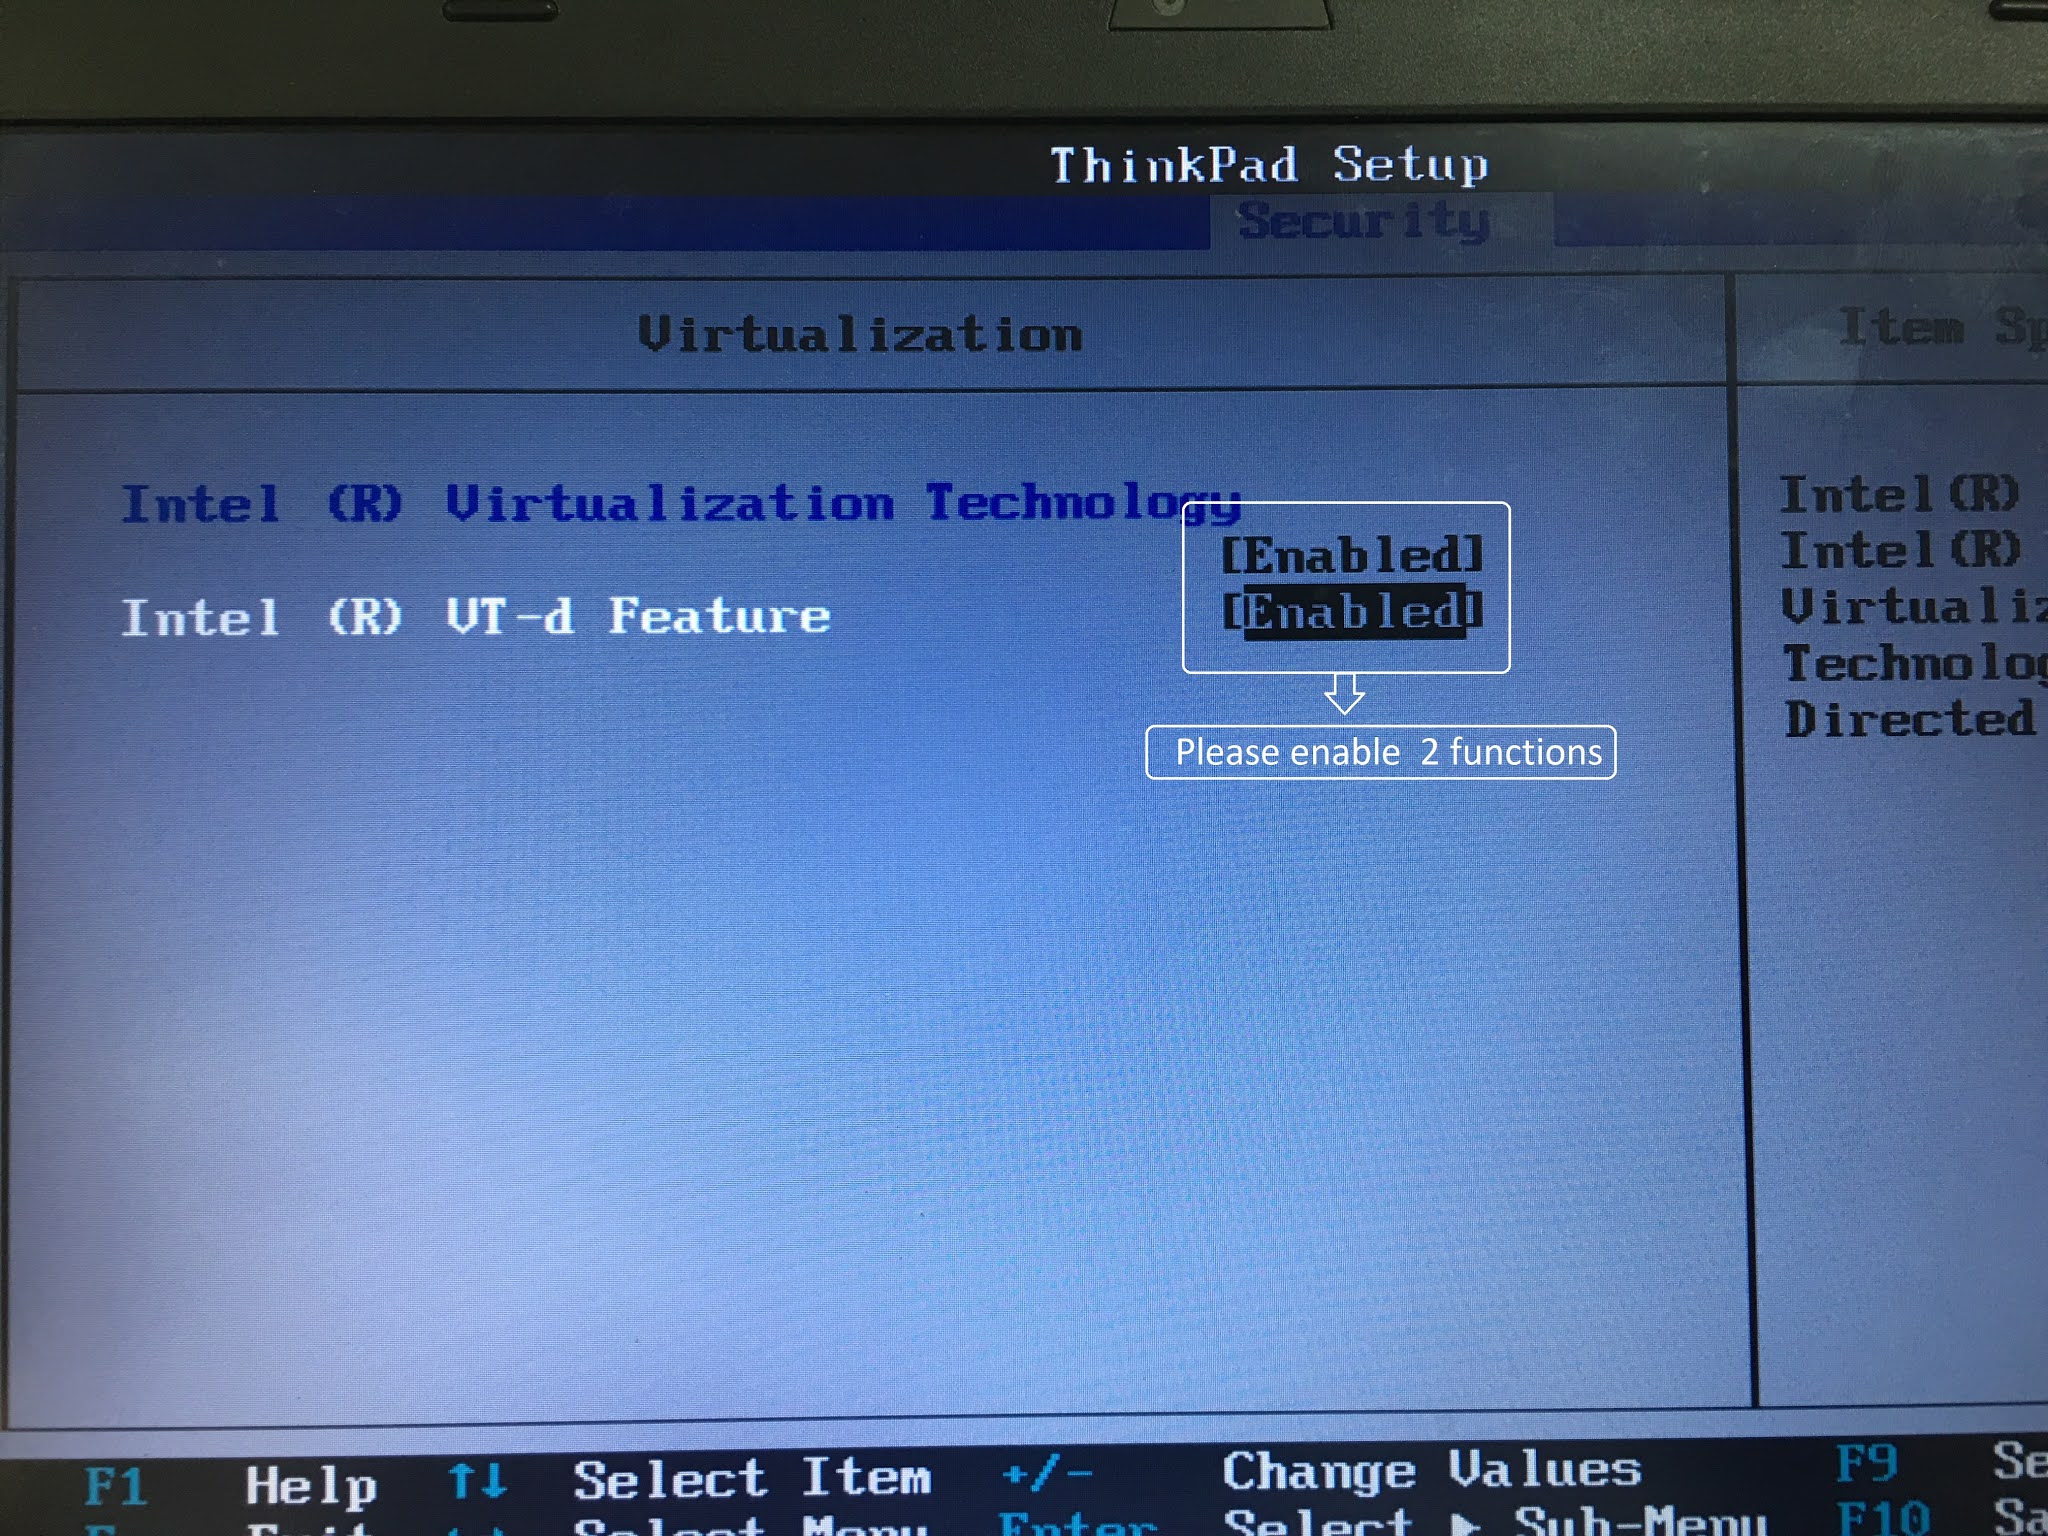
Regardless of whether your computer is using BIOS or perhaps UEFI, once you go into the product selection settings, you can find a good option called “Intel VT-x”, “Intel” Virtualization Technology “,” Extensions virtualization “,” Vanderpool “.” or a similar problem.

You will often find the option in the best submenu “Processor”. The submenu is strategically located somewhere under Chipset, Northbridge, Advanced Chipset Management, or Advanced CPU Configuration.
Activate this special option, then select “Save Exit” and the appropriate function to save the environment changes and restart the computer.
What to do if you don’t see the Intel VT-x BIOS or UEFI option
Unfortunately, a number of laptop and motherboard manufacturers do not offer to include Intel VT-x in theirtheir BIOS or UEFI controls. If you do not see this option, try searching the Internet for the model number of your business laptop or motherboard if it is a desktop computer and “Activate Intel VT-x”.
RELATED: How to check your motherboard model number on Windows PC
In some cases, manufacturers may only release one BIOS or UEFI firmware update that includes this option. If you’re lucky, updating your BIOS or UEFI firmware might help.
And remember that if you need an older processor, it may not support the virtualization capabilities of Intel VT-x or AMD-V compute devices.
Speed up your computer today with this simple download.
How do I enable virtualization in BIOS?
Restart your computer and press the BIOS button.Find the CPU configuration section.Find these special settings for virtualization.Select an option to enable virtualization.Save your changes.Exit BIOS and restart your computer.
Should I enable VT in BIOS?
While it’s true that you shouldn’t enable VT unless you are actually using it, there is simply no longer any risk that the feature is there or not. You need to protect your entire system in the best possible way, whether it is a virtualization application. VT helps make everything that was previously unavailable possible!
How do I enable VT in UEFI BIOS?
Bios/Firmware Vt-Modus Aktivieren
Bios/firmware Vt-modus Inschakelen
BIOS / Firmware Habilitar Modo Vt
Биос / прошивка Включить режим Vt
Bios/firmware Abilita Modalità Vt
Bios/firmware Activer Le Mode Vt
Bios/firmware Włącz Tryb Vt
Bios / Firmware Habilitar Modo Vt
Bios/firmware Aktivera Vt-läge
BIOS/펌웨어 Vt 모드 활성화